I let an AI hack this Python app — Shannon for AI Penetration Testing!
If you've been following me for a while, you know I’m not a cybersecurity expert but a curious person who loves to learn and build. With everything we do, and some of the things that make it to the public, there’s one thing we always do or should do — that is, aggressive testing of the product and the code!
Imagine if I build an application using, say, Python, and deploy it without testing, you never know what you’ll end up with. Given that these days most of the code is anyway written using AI, those who’ll fix it early will have an edge over those who are just vibe coding and shipping (sometimes me xd:)
In this blog, I will take you through one of the amazing AI security tools that I tried and couldn’t believe that we have tools that do end-to-end testing of my code and application without me touching a laptop even once. I recently came across this tool via LinkedIn and immediately added it to my bookmarks to make sure I do not forget giving it a try xd.
Introducing — Shannon by Keygraph!

When I first read about it, like any other AI tool/product, I thought, cool, maybe it works to some extent. But when I implemented it, the results I saw were not only helpful but also a detailed analysis of multiple bugs and vulnerabilities that exist in my code, which sometimes even I would not be able to find without spending much time and effort.
But AI does that, and it is the beauty of AI, when applied in a specific domain, we see results we generally do not expect and are surprised each passing day. Let’s quickly see how Shannon works and what it exactly does that it is so goated! (already cooking 26k GitHub stars :/ ) This blog is best for someone who has recently started diving deep into taking their projects one step further by testing them for such kinds of vulnerabilities. It means you are serious about your project and not only vibe coding for likes xd :)
Testing and Reviewing Shannon by Keygraph
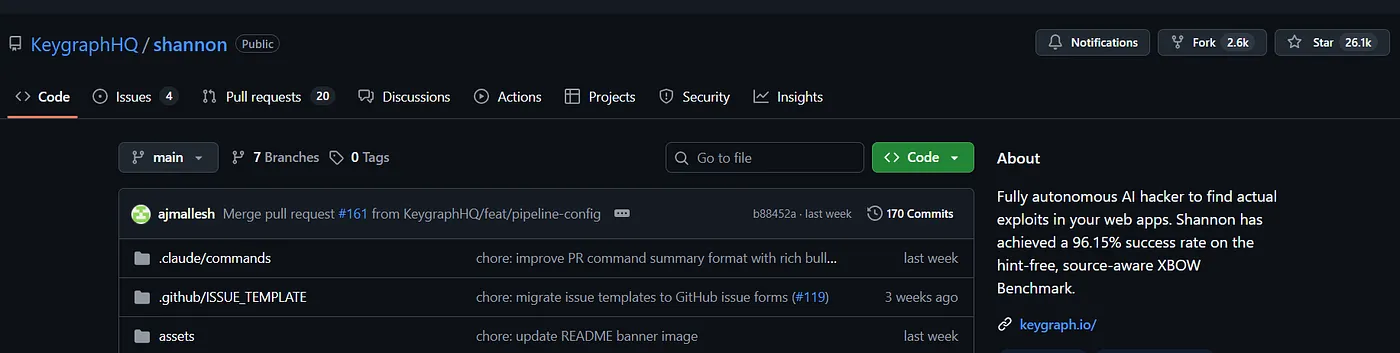
If you go by their GitHub profile, you’ll find a unique description that explains everything about them in one line —
Fully autonomous AI hacker to find actual exploits in your web apps.
Shannon has achieved a 96.15% success rate on the hint-free,
source-aware XBOW Benchmark.
A fully autonomous AI hacker/penetration testing framework that goes deep inside your application code through multiple agents and finds exploits and vulnerabilities that even you’d find hard to get everything in one try. So if you have an application or backend code ready to deploy and want to do a quick security checkup for your API, you need to install Shannon and give it a try.
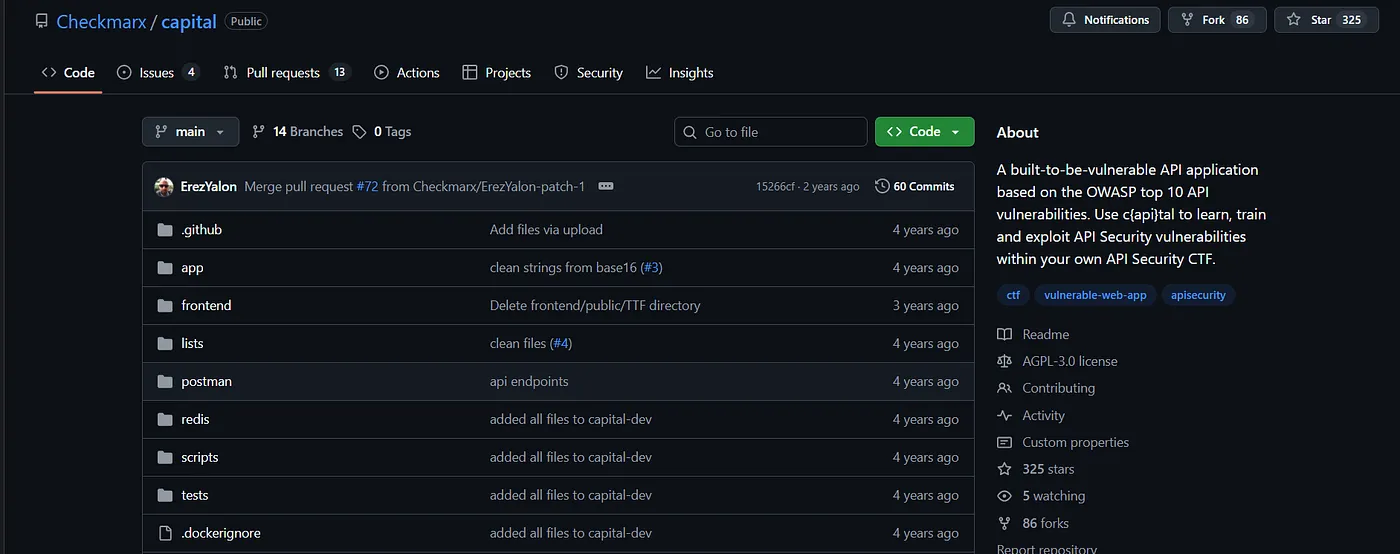
For this blog, I tested Shannon on an intentionally vulnerable web app created using FastAPI, built for this kind of cybersecurity testing/learning —
Before I move ahead with how and what Shannon gives as output, which makes it amazing, maybe we should have some understanding of the problem it is solving and how it is done earlier by penetration testers manually.
For now, among all of the other ways, there are certain steps provided by the OWASP Foundation and Penetration Testing Execution Standard (PTES), which is considered an industry norm. They have defined a standardized lifecycle which human pen testers generally perform, and it looks like this —
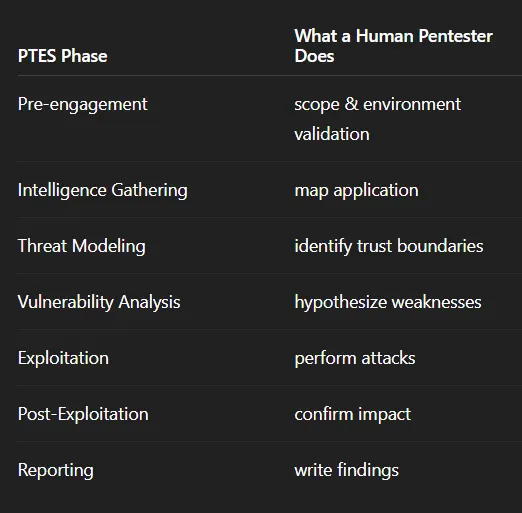
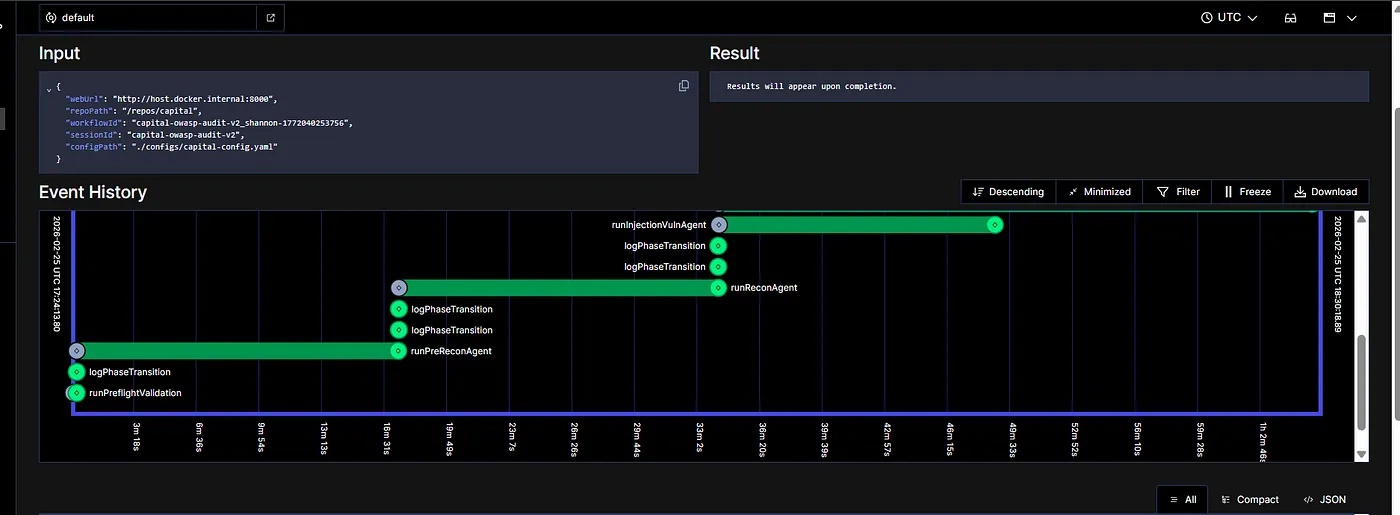
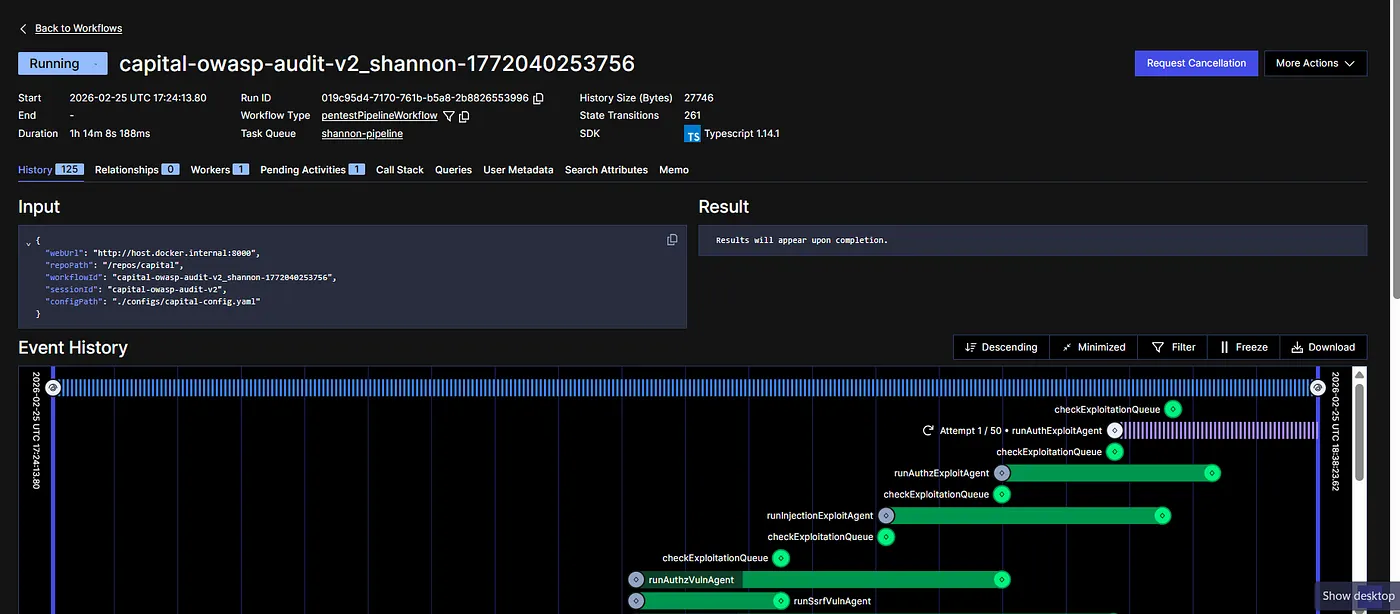
It’s a standard process, and that’s something Shannon is best at. So I decided to test it on the Capital and see if it is able to find any vulnerabilities. The moment you start your servers, you’ll find a Shannon screen like the one shown below, where you can see Shannon running the pen test.
Note that our main goal for this blog would not be how to install Shannon, because that’s something already available on the website and doable with any coding IDEs easily. I personally used Antigravity to install everything required for setting up Shannon in one shot. I installed and ran Capital as well in order to test it. Before I move towards what Shannon gave as output, which amazed me, I assume that you have just given a quick look at their GitHub, where you’d find everything— Click Here

To give you tl;dr, you’d need two things to start — Docker and a Claude API token, which will be used by these agents running to find vulnerabilities. The whole process for me took around 1 hour and 55 minutes, which also means that the system was running autonomously for 2 hours, and all the agents were working in order to give me the final report after aggressive API testing.

Let’s look at each agent one by one and understand what it exactly does and why so! The whole process starts with runPreReconAgent. This is the very first step of pen testing. Not just here but in general. It is said that most vulnerabilities are discovered during the information gathering and mapping stage, not during exploitation. That means it usually happens when someone is trying to learn more about the system, its authentication mechanism, ownership of objects, user roles, API structure, etc.

The moment one learns these things, most of the vulnerabilities start becoming clear, and we can see the possibilities where it might fail. Almost all modern API security revolves around one concept — broken access control, and we try to learn more about it in this step.
If you notice, in the screenshot above, you will find that it tries to run the loop 50 times. Why do you think so? It is not because it gets errors and it retries. Rather, it is implementing a security loop from the attackers’ methodology, which we call — OODA, aka Observe, Orient, Decide, and Act.
So during the testing, each agent here tries to follow this principle, where it sends requests to the API, interprets the response, hypothesizes a vulnerability, and then attempts exploit. Something that a new attacker would do. This is the advantage of using an autonomous testing framework: you get to do this without any effort and still get the audit done. If I summarize the overall behaviour here, in the form of a question, it would be—
Can an LLM build a security mental model of a software system from external behaviour? So logic-level security reasoning is being automated. It cannot be done in one prompt, asking AI to find vulnerabilities :)
Once you run the Shannon agent, you will find your results in this “deliverables” folder inside audi-logs.
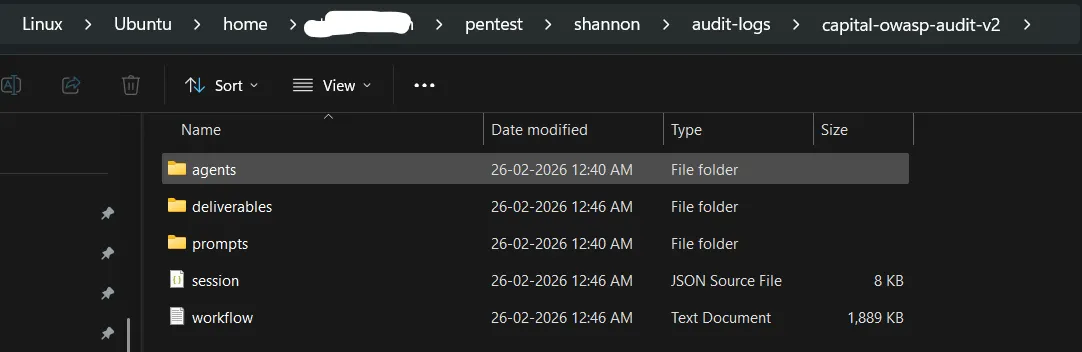
Inside deliverables, you will find responses of all of the individual agents performing separate tasks in an md file.

Let me show you something from the first agent’s result that it generates. The first step is Reconnaissance, where it learns everything about the system. Here’s the snapshot of the result —
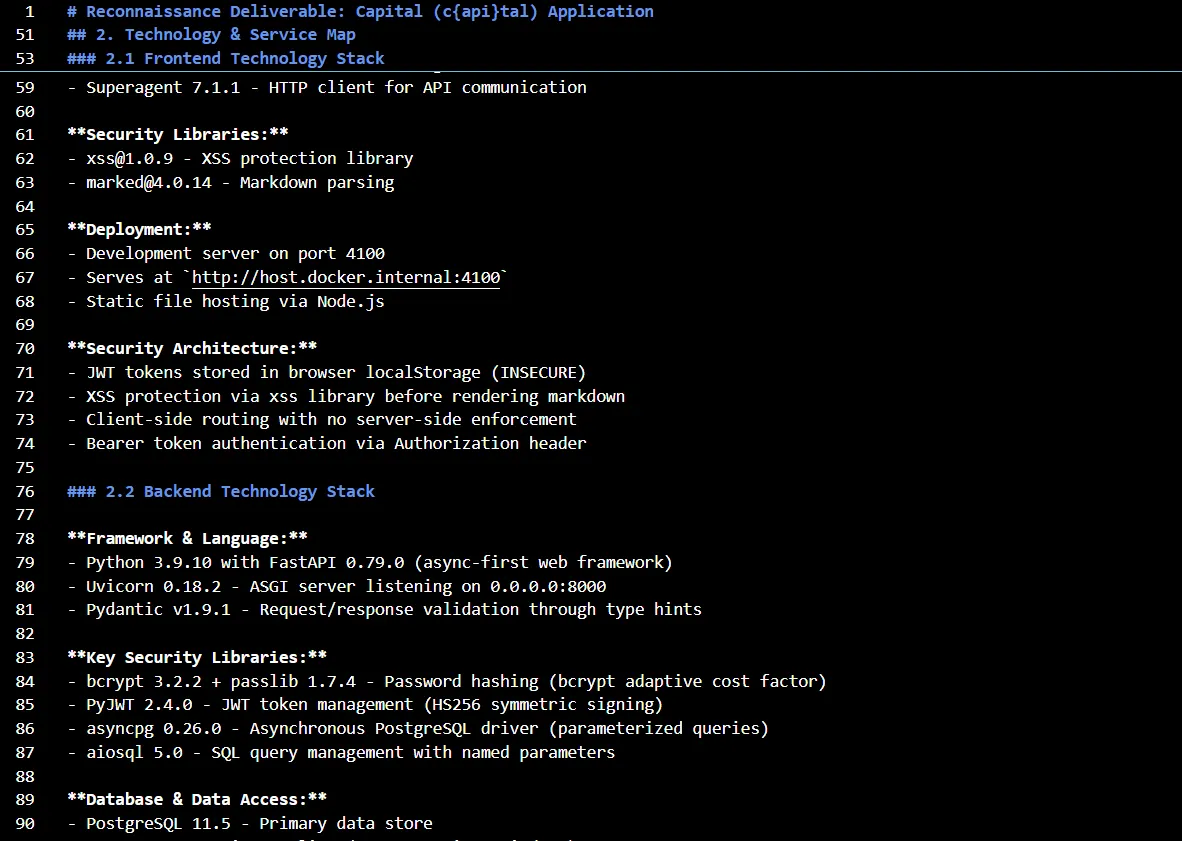
In this step, it learns everything about Capital, including its technology, frontend stack, backend tech stack, infrastructure components, authentication entry points, authentication mechanism, role assignment process, privilege storage and validation, role switching, API endpoints, potential input vectors, URL parameters, POST body fields, broken function-level authorization, authentication bypass, path parameters, entity metadata, cookie values and pretty much everything associated with the application that can break it in some form or other.
Get Shresth Shukla’s stories in your inbox
Join Medium for free to get updates from this writer.
Subscribe
Subscribe
Remember me for faster sign in
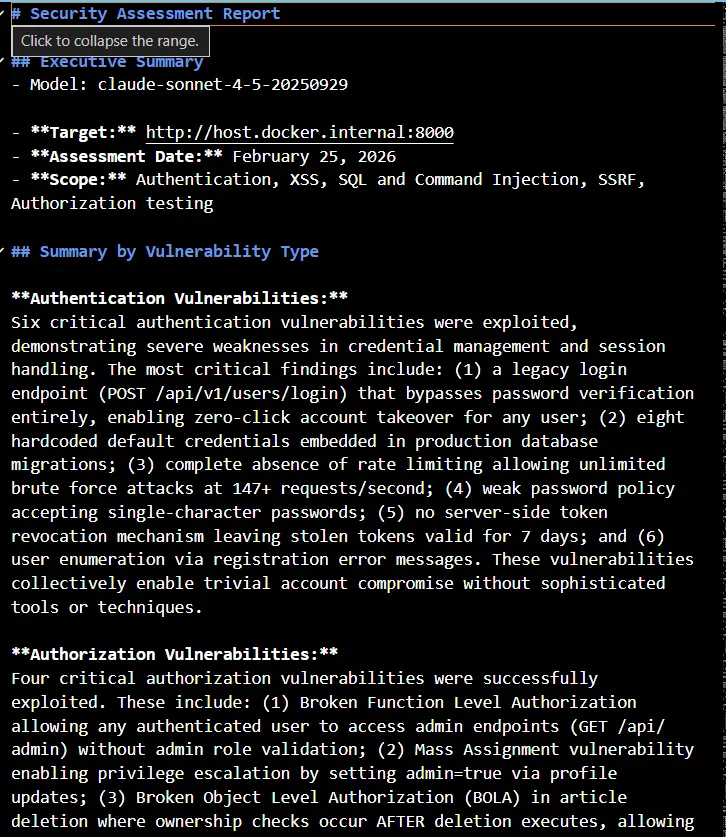
Here’s the executive summary it creates along with the detailed step-by-step report, which you can read here. Consider this step as the learning for upcoming agents, which will utilize these findings and perform testing on the basis of the current understanding of the system. With each section, it also contains an action step to be taken or a recommendation that needs to be implemented in order to secure it.
This reconnaissance report provides a comprehensive map of the application's attack surface, with special emphasis on authorization and privilege escalation opportunities for the Authorization Analysis Specialist.
**Key Sections for Authorization Analysis:**
- **Section 4 (API Endpoint Inventory):** Contains authorization details for each endpoint - focus on "Required Role" and "Object ID Parameters" columns to identify IDOR candidates.
- **Section 6.4 (Guards Directory):** Catalog of authorization controls - understand what each guard means before analyzing vulnerabilities.
- **Section 7 (Role & Privilege Architecture):** Complete role hierarchy and privilege mapping - use this to understand the privilege lattice and identify escalation targets.
- **Section 8 (Authorization Vulnerability Candidates):** Pre-prioritized lists of endpoints for horizontal, vertical, and context-based authorization testing.
**How to Use the Network Mapping (Section 6):** The entity/flow mapping shows system boundaries and data sensitivity levels. Pay special attention to flows marked with authorization guards and entities handling PII/sensitive data.
**Priority Order for Testing:** Start with Section 8's High-priority horizontal candidates, then vertical escalation endpoints for each role level, finally context-based workflow bypasses.
## 1. Executive Summary
The Capital application (c{api}tal) is a deliberately vulnerable web application implementing the RealWorld API specification (Conduit blogging platform). This reconnaissance analysis reveals a **hybrid monolithic architecture** combining a **Python FastAPI backend** (Python 3.9.10 with FastAPI 0.79.0) with a **React 18.0.0 frontend**, connected through **PostgreSQL 11.5** and **Redis** data stores.
The application demonstrates modern async-first design patterns but contains **multiple critical security vulnerabilities intentionally introduced for Capture The Flag (CTF) educational purposes**. The attack surface consists of 21+ RESTful API endpoints across authentication, user management, article/comment management, and administrative functions.
**Core Technology Stack:**
- **Backend:** Python 3.9.10, FastAPI 0.79.0, Uvicorn 0.18.2 (ASGI server)
- **Frontend:** React 18.0.0, Redux Toolkit 1.6.0, React Router v6
- **Database:** PostgreSQL 11.5 (asyncpg 0.26.0 driver)
- **Cache:** Redis (configured but not actively used)
- **Authentication:** Custom JWT implementation (HS256, 7-day tokens)
- **Hosting:** Docker containerized deployment (port 8000 backend, port 4100 frontend)
**Primary User-Facing Components:**
- Public article browsing and viewing
- User registration and authentication system
- Article creation, editing, and deletion
- Comment system on articles
- User profiles with follow/unfollow functionality
- Article favoriting system
- Hidden administrative and debug endpoints (not in OpenAPI schema)
**Critical Security Findings Summary:**
1. **Broken Object Level Authorization (BOLA):** Article and comment deletion endpoints allow any authenticated user to delete any resource without ownership verification
2. **Broken Function Level Authorization:** Admin, logging, and debug endpoints accessible to any authenticated user without role checks
3. **Mass Assignment Vulnerability:** Users can elevate privileges by setting the `admin` flag through profile updates
4. **Command Injection:** Debug endpoint allows arbitrary system command execution with weak blocklist-based filtering
5. **Authentication Bypass:** Legacy v1 login endpoint returns valid tokens without password verification
6. **Excessive Data Exposure:** Hardcoded credit card data (full PAN + CVV) exposed through profile endpoint
7. **Insecure Token Storage:** JWT tokens stored in localStorage (vulnerable to XSS attacks)
8. **Overly Permissive CORS:** Configured to accept requests from any origin with credentials enabled
The application follows a three-tier architecture with clear separation of concerns, but security controls are deliberately weakened or omitted, representing realistic vulnerability scenarios for penetration testing training.
Fun fact — it generated a 900-line report just as the first step, as part of reconnaissance delivery, which I believe is amazing because I read it, and it covers almost everything that one should know about Capital in order to break/exploit it.
Once this crucial step is done, we start with the further security testing. Note that, earlier we had agents like — runPreReconAgent, but once it knows the vulnerabilities, it starts exploiting them and runs multiple agents, like—
- runAuthExploitAgent
- runInjectionExploitAgent
- runAuthzVulnAgent
- runSsrfVulnAgent
- checkExploitationQueue
Also, it would be wrong to say that it only helps you find vulnerabilities and exploit them to create a detailed report. Rather, it generates a report that makes sense from both positive and negative perspectives. Which means if something is good or secured, it correctly documents those items. For example, the Authentication Analysis Report, it identifies those points that are either securely designed or not implemented, which reduces the attack vectors and makes the application less vulnerable.

And now let me show you the best part of Shannon. It creates an exploitation evidence report for all the vulnerabilities it finds and gives a detailed breakdown of the exact issue. In our application, we have a serious authentication vulnerability where public endpoints are accessible without authentication. Meaning, the legacy authentication endpoint accepts any random password for any email address. That means allowing a complete takeover without knowing the password.
The report not only contains the breakdown but also gives you the exact steps needed to replicate the issue. It clearly mentions the issue that the password is accepted but never validated. Then there’s one more issue in our application, which is the complete absence of rate limiting, which might enable brute force attacks, where it exploits the application for multiple requests, and all are processed.
The report contains all the authentication-related vulnerabilities in one place, along with a detailed breakdown of how to replicate, what Shannon does, and what it found by doing so. It gives you proof, not just opinions. It exploits, gathers data, and creates a factual report based on its outputs. And that’s the best part of automating this whole security testing that manual testers do these days. You can find all these detailed reports on their GitHub if you want to read more in detail and see for yourself.

It also does the injection bypass testing and gives both an executive summary and a technical breakdown of the problem while highlighting the severity of the issue, which in the case of injection, is also generally critical.
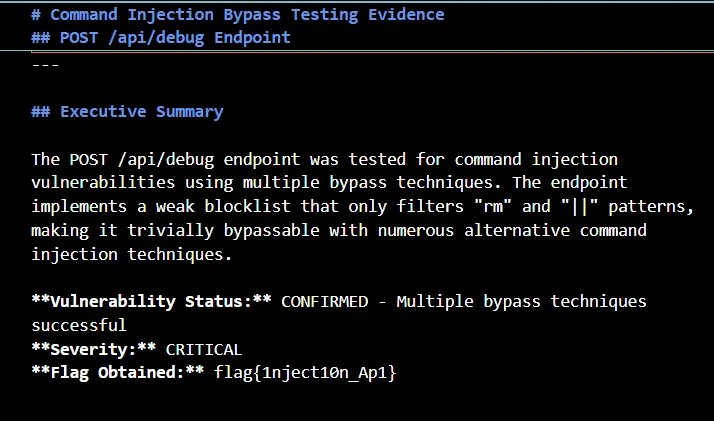
It performs multiple command injections and finds results like the blocklist is incomplete and fails to prevent:
- Single pipe
| - Ampersand
& - Semicolon
; - Command substitution
$() - Backticks
` - AND operator
&&
It again gives proof for all the exploits based on its testing. With all these details, it might be a bit confusing here. Let me give you a quick summary. If you have built an application using, say, FastAPI, and now you want to test whether the API is secured or not, all you need to do is to run your backend server and give Shannon its access. That’s it.
Now Shannon will help you identify all the possible ways your API/backend can be exploited, be it in terms of authentication, injection, or any other. It will find all possible attack vectors, it will exploit the application and document everything with proof, and give you a detailed evidence-led report of all the vulnerabilities that you can improve and immediately fix based on severity. This is the fastest way of testing your application code if you are working in a startup kinda environment. You need AI productivity, and Shannon will give you exactly that with its domain expertise in security.

If you are a developer, you would need all the agent-level reports in order to fix it. If you are a team lead, you might need a comprehensive report that summarizes all the vulnerabilities that were exploited and helps you make a quick decision on what to do next.
Final Thoughts
After reading each report and the evidence it gave me, I must say, it is best at what it is built for. It does end-to-end pen testing, finds vulnerabilities, exploits them, captures all the evidences and gives you the final report, both on agent level performing separate exploitations and a comprehensive report combining responses from all of them, while following the standardization provided by PTES.
Earlier, traditional security audits used to test for different inputs. Shannon considers assumptions that might not be there, but there’s a possibility of something happening in the future. The overall idea is not only to find whether the application crashes but also to find whether it responds incorrectly. So it analyzes the outputs in order to find the severity of the vulnerability.
Who should use it? — If you are a developer, especially the vibe coder one, you are going to love this because now you can vibe test. You take these reports back to agents and fix your code based on these insights. This is the best way to take your application from the vibe coding stage to production. If you have spent enough time in this domain, you already know about Claude's capabilities, and Shannon uses Claude to do all this amazing stuff. I’d love to see you all trying this out. Check out their GitHub page right now, and ask your coding agent to immediately install it and perform a security audit of your application.
See you in another blog soon. If you have an AI product that you want me to try and share feedback on/write about, I’d love to do so — just drop me a DM on LinkedIn or reach out via mail. I’m always excited about experimenting with new AI products and have been loving doing this for quite some time now. Till then, cheers and see ya.